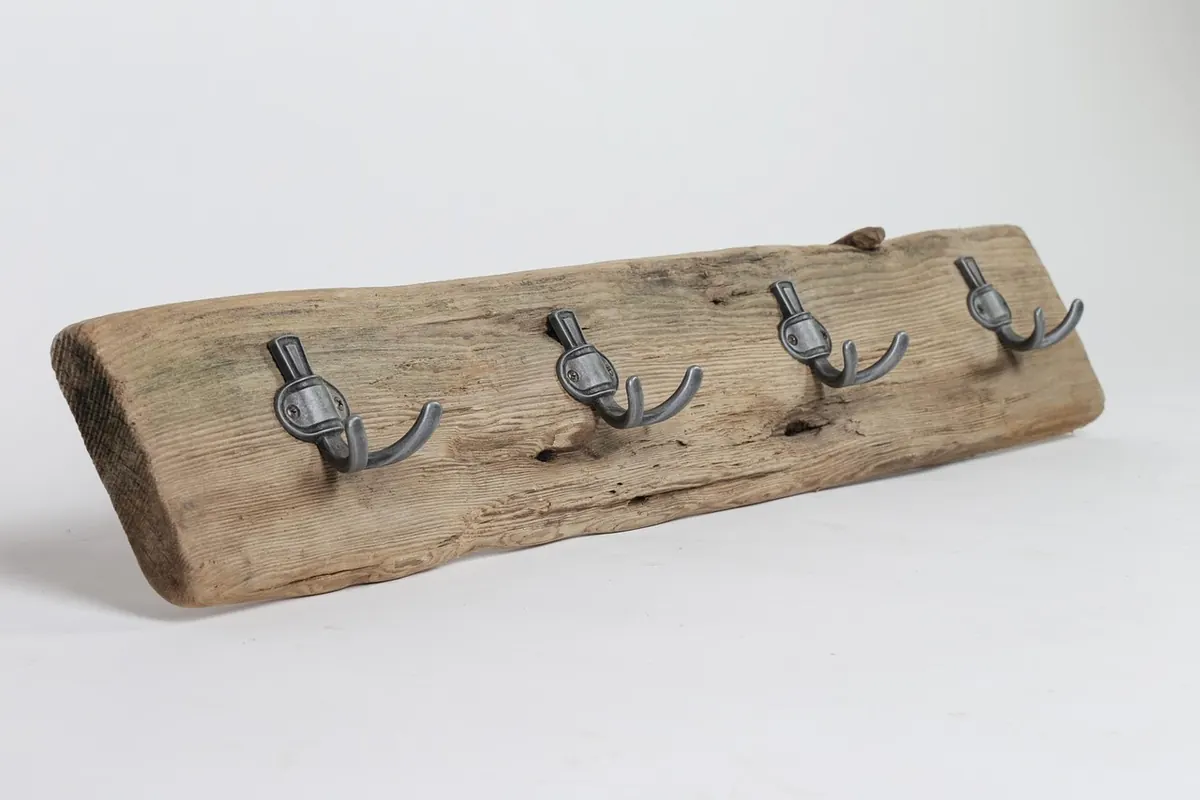
Some projects begin with a drawing. This one begins with a board you could not bring yourself to skip. A length of old pine with a split at one end, a scatter of nail holes, and a colour no tin of stain will ever fake. Add a coil of bent wire and a spare Saturday, and you have the bones of a coat rack that will outlast most of the shop-bought ones hanging in hallways up and down the country.
The appeal is simple. Reclaimed pine is dry, stable and full of history. Wire hooks cost very little and take a bend beautifully. Put the two together and you get something with weight and warmth, the sort of thing guests reach for without being asked.
What You Will Need
Gather everything before you start. Half the pleasure of this project is that it needs so little.
- A reclaimed pine board, roughly 90 to 120cm long, 12 to 14cm wide and at least 2cm thick. Thicker timber holds screws better and is less likely to bow.
- Four to six wire hooks. Either bend your own from 4mm galvanised wire or use ready-made bent wire hooks.
- Wood screws, 30 to 40mm long, plus two keyhole plates or a French cleat for hanging.
- Wall fixings suited to your wall: plugs and screws for masonry, proper hollow-wall anchors for plasterboard, or screws straight into studs.
- Sandpaper in 120, 180 and 240 grit, a wire brush, and beeswax, Danish oil or a clear matt varnish.
- Optional: liming wax for a paler, chalky look.
On the tool side you will want a hand saw or jigsaw, a drill with 3mm and 5mm bits, a countersink, pincers for pulling old nails, round-nose pliers, a vice, and a length of dowel or metal pipe for bending wire around. Add a spirit level, a tape measure, a pencil, and a dust mask and safety glasses.
Start with the Wood, Not the Hooks
Before anything else, get the board clean and dry. Pull every nail with pincers, working from the back so you do not tear the face grain. Cut away any split or rotten end, then look closely at the surface. Fine holes with a dusting of pale frass underneath suggest woodworm. If the holes look fresh, treat the board with a proprietary woodworm treatment and follow the manufacturer's instructions to the letter before bringing it into the house.
If the timber came from a skip, a shed or a building site, let it sit indoors for a week or two. Old boards move as they adjust to a heated house, and you would rather that happened before you screw hooks into it.
Be choosy about what you rescue. Avoid anything that smells of creosote or has been soaked in an unknown treatment. Pallets are usually fine if they carry the HT stamp, which means heat treated. Skip the ones stamped MB, which have been fumigated. If an old board is painted and you suspect the paint predates the 1970s, do not dry-sand it. Seal it, strip it carefully, or take advice first.
Sand in stages, 120 then 180 then 240, but stop before you flatten the character out of it. Every nail hole, saw mark and water stain is what makes the finished rack look found rather than bought.
Bending the Wire Hooks
If you are making your own, cut the wire into lengths of about 18 to 20cm with a hacksaw. Work cold and gradually. Four millimetre wire will not bend neatly in one heroic pull; it will kink, and a kinked hook looks like a mistake.
The shape you want is straightforward: a flat shank that sits against the board, an outward curve that carries the coat, and a slight upturn at the tip so nothing slides off during the night.
- Clamp the wire in the vice and bend the main curve around a length of dowel or pipe.
- Flatten the last 4cm of the shank with a hammer so it sits flush against the pine.
- Drill two 3mm pilot holes through the flattened section.
- Turn the tip upward by a few centimetres, gently, with round-nose pliers.
To keep every hook identical, make a simple jig: screw two short battens to a scrap of board to act as stops for the wire, then bend against them each time. Consistency matters more than perfection here. Six hooks that match look intentional; six that differ look accidental.
New galvanised wire can look harsh against old timber. Leaving the hooks outside for a few weeks, or wiping them with a vinegar and salt solution, will dull them down. If you do that, seal them afterwards with a thin coat of clear lacquer, otherwise they will leave rust marks on pale coats.
Laying Out and Fitting
Spacing decides whether the rack feels generous or cramped. Leave 12 to 15cm between hooks for everyday coats, and closer to 20cm if you will be hanging bulky jackets or bags. Keep at least 5cm clear at each end so the board cannot split at the edge.
Mark the centre point of the board, then work outwards from it so any awkward gap ends up evenly shared rather than bunched at one end. Run a pencil line along the board and check it with a level. Look before you drill: knots and old nail holes are the two places a screw will fight you, so shift the hook a centimetre if one of them sits in the way.
Drill pilot holes slightly narrower than the screw shank. Rub a candle stub or a bar of soap along the threads and the screws will drive in with far less effort.
Finishing the Board
Finish the pine before you fit the hooks. It is much easier to work on a flat board than one bristling with wire.
Beeswax gives a soft, low sheen and suits a board that will not be handled much. Danish oil soaks in, brings up the grain and offers better protection, so apply two or three thin coats and wipe off the excess each time. If the rack is going in a hallway where wet coats will drip on it, a couple of coats of clear matt varnish or a hardwax oil will serve you better. Liming wax pushed into the grain and wiped back gives an old, chalky finish that suits pale hallways. Whichever you choose, let it cure properly, usually a day or more, before you hang anything on it.
Hanging It Square and Solid
A rack full of winter coats is heavier than most people expect, and the load pulls down and out at the same time. Fixings are not the place to improvise.
Find the studs with a detector or by tapping the wall, and aim to get at least two screws into solid timber. If your wall is plasterboard with no studs behind it, use hollow-wall anchors rated well above the weight you plan to hang, and use more of them than feels necessary. For a board 90cm or longer, a French cleat is the neatest solution: one half screwed to the wall, the other to the back of the rack. It spreads the weight along the full length and lets you lift the rack off for decorating.
Height is personal, so measure rather than guess. Take your longest coat, add a hand's width of clearance above the floor, and work backwards to find the top of the board. Mark the wall, check it with a level, and drill. Then lift the rack into place with a second pair of hands, because holding a metre of pine steady while you drive screws is a job for two people.
Small Touches That Make It Look Deliberate
- Round the ends and edges of the board with a plane, a sander or a few passes of coarse paper so it feels worn rather than cut yesterday.
- Keep the original nail holes on show. Filling them makes the board look like a cheap shelf.
- Add a narrow shelf along the top, supported by two small battens, for hats, baskets or keys.
- Use slotted brass screws on the hooks if you can find them. They warm up nicely against dark pine.
Looking After It
Wipe the board with a dry cloth now and then, and give it a fresh coat of wax or oil once a year. Check the hook screws each autumn, before the coat season arrives, and tighten any that have worked loose. If a hook ever feels sloppy, take it off, fill the hole with a sliver of wood glued in place, drill again and refit.
Press a fingernail into the finished surface before you hang a heavy coat on it. If it leaves a mark, the finish is still soft; give it another day. That small piece of patience is the difference between a rack that looks handsome for a decade and one that gathers dust in the garage by February.
Photo: RivieraWood / Pixabay